
 EN



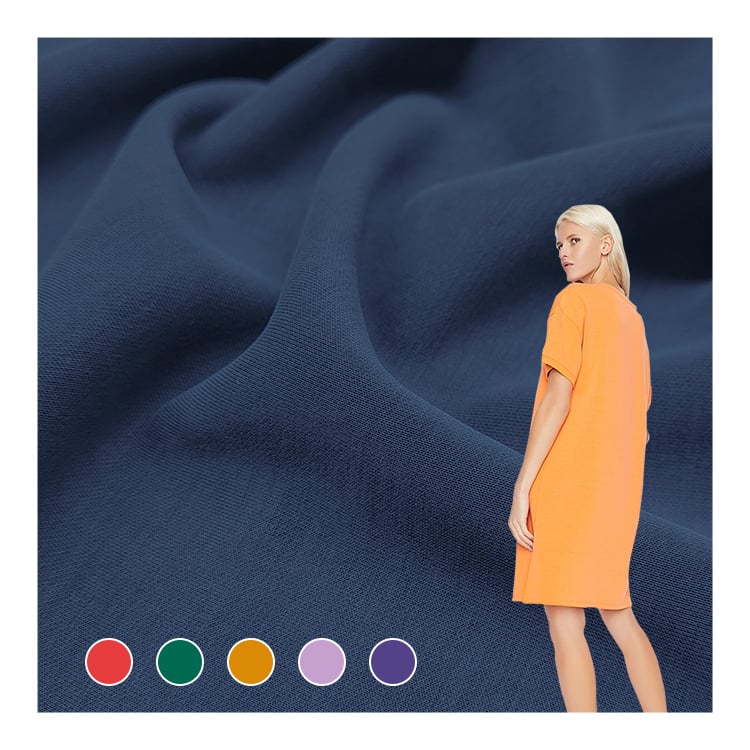
Sewing with scuba fabric requires specialized knowledge and technique that differs significantly from working with standard textile materials. Scuba fabric, also known as scuba knit fabric, is a dense, double-knit material prized for its stretch, durability, and professional appearance in garment construction. Many sewers find working with scuba fabric challenging initially, but with the right approach and understanding of its properties, you can create professional-quality garments efficiently. This guide provides expert tips and practical strategies for successfully sewing scuba fabric in your projects.
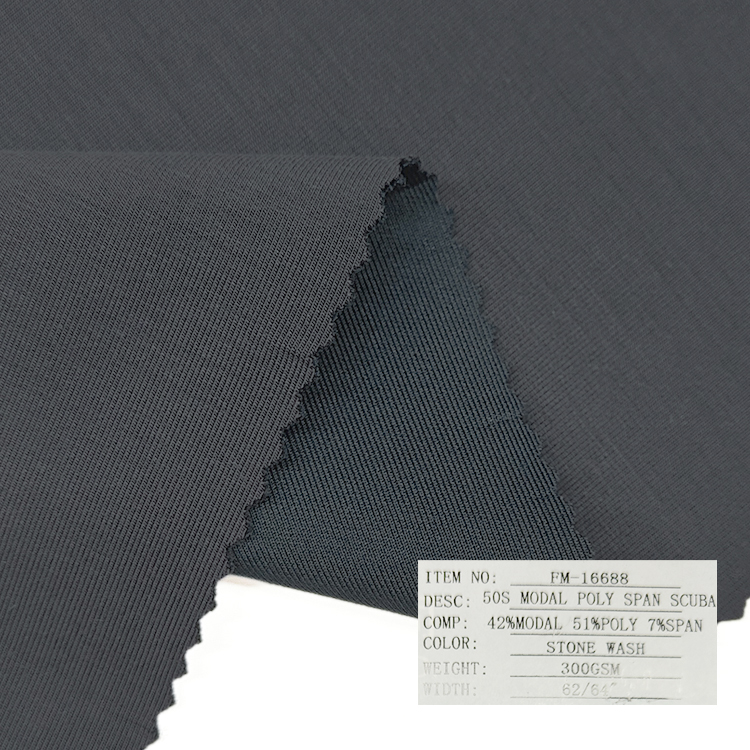
Understanding scuba fabric before you begin sewing is essential for achieving quality results. Scuba fabric's unique construction makes it behave differently than jersey or other knit materials, requiring adjustments to needle type, thread tension, and cutting techniques. The weight and structure of scuba fabric provide excellent recovery and shape retention, which means your finished garments will maintain their form through repeated wear and washing. Mastering scuba fabric techniques expands your sewing capabilities and opens doors to creating professional activewear and structured garments.
Choosing the Right Tools and Equipment for Scuba Fabric
Selecting the Correct Needle and Thread
Working with scuba fabric starts with selecting appropriate sewing equipment designed for heavyweight knit materials. A stretch needle, such as a size 75/11 or 90/14 stretch needle, is essential when sewing scuba fabric because the needle's unique scarf and eye design prevents skipped stitches and snagging that occurs with regular needles. Stretch needles have a deeper groove and special scarf that accommodate the movement of scuba fabric without damaging fibers. Polyester thread or serger thread works exceptionally well with scuba fabric, as these threads have enough elasticity to move with the material without breaking during wear. Many experienced sewers recommend using thread that matches the scuba fabric color to ensure seams blend seamlessly into the finished garment.
Preparing Your Machine and Workspace
Before cutting and sewing scuba fabric, prepare your machine for optimal performance with this heavyweight material. Test your machine's tension using scrap pieces of scuba fabric to ensure stitches form properly without puckering or skipping. Lower your presser foot pressure slightly when working with scuba fabric, as excessive pressure can stretch or distort the material as it feeds through the machine. Use a walking foot or dual-feed foot when sewing scuba fabric to ensure even feeding of all layers and prevent the bottom layer from shifting. Stabilize your work surface by clearing sufficient space and ensuring your cutting mat and rotary cutter are in good condition, as maintaining accurate cuts is crucial when handling scuba fabric.
Cutting and Marking Techniques for Scuba Fabric
Accurate Pattern Layout and Cutting Methods
Proper cutting technique is fundamental to successful projects using scuba fabric, as mistakes at this stage impact every subsequent step. Lay out your pattern pieces on a single layer of scuba fabric with the nap running the same direction, preventing color variations that occur when nap runs in opposite directions. Use pattern weights or pins strategically to hold your scuba fabric pattern in place while cutting, being careful not to distort the material with excessive pinning. Cut scuba fabric using a sharp rotary cutter with a fresh blade, as dull blades create uneven edges that fray and complicate seaming. Take your time when cutting scuba fabric, using steady, controlled pressure along pattern lines to ensure precision that allows seams to align properly during construction.
Marking and Notching Considerations
Marking seam lines and alignment points on scuba fabric requires careful consideration of the material's surface characteristics. Tailor's chalk marks on scuba fabric can be visible if not applied carefully, so use chalk sparingly or opt for removable fabric markers that won't damage the material. Cutting small notches at seam intersections provides reliable alignment marks when sewing scuba fabric, eliminating confusion about where seams should meet. Some sewers prefer using clips or safety pins to hold scuba fabric pieces aligned instead of traditional chalk marks, which can show through lighter-colored fabrics. The key is developing a marking system that works with scuba fabric's characteristics while remaining invisible in the finished garment.
Seaming and Finishing Strategies for Scuba Fabric
Constructing Strong, Flexible Seams
Seaming scuba fabric demands attention to stitch length and seam allowance specifications that differ from woven materials. Use a stitch length of 2.5 to 3.0 millimeters when sewing scuba fabric, which creates consistent stitches that remain flexible as the material moves and stretches during wear. A half-inch seam allowance is standard for scuba fabric garments, providing adequate material for secure construction while maintaining comfortable garment fit. Test seams on scuba fabric scraps before beginning your project, checking that stitches hold under tension without breaking or pulling. Many professionals use a narrow zigzag stitch instead of straight stitches when sewing scuba fabric, as the zigzag accommodates material movement and prevents seam breakage during repeated wearing and washing.
Finishing Seams and Edges
Finishing seams properly protects scuba fabric garments from fraying and extends garment longevity significantly. A serger provides the most professional finish for scuba fabric seams, creating a clean, enclosed edge that prevents unraveling while maintaining the material's stretch characteristics. If you don't have a serger, a narrow zigzag stitch combined with careful trimming creates an acceptable seam finish on scuba fabric that resists fraying through normal use and washing cycles. Trimming seam allowances to three-eighths inch before finishing reduces bulk in finished seams while maintaining structural integrity. Consider using twin needles when sewing scuba fabric hems and cuffs, as this technique creates professional-looking, flexible finishes that move with the material without cracking or breaking.
Troubleshooting Common Scuba Fabric Sewing Issues
Addressing Skipped Stitches and Tension Problems
Skipped stitches represent the most frequent problem when sewing scuba fabric, typically resulting from needle deflection or inadequate needle penetration. Replace your needle with a fresh stretch needle immediately if you notice skipped stitches, as even slightly bent or dulled needles cause problems when working with scuba fabric. Adjust your machine's tension if stitches skip consistently, testing adjustments on scuba fabric scraps before continuing with your project. Increase your presser foot pressure slightly if skipped stitches persist, ensuring the needle can penetrate scuba fabric properly without the material compressing around the needle shaft. Clean your machine thoroughly, particularly the tension discs and needle plate area, as lint accumulation affects tension and stitch quality when working with dense materials like scuba fabric.
Managing Puckering and Distortion
Puckered seams and distorted edges undermine the professional appearance of scuba fabric garments and often result from excessive tension or improper presser foot pressure. Reduce presser foot pressure when sewing scuba fabric, allowing the material to feed smoothly through your machine without compression that causes distortion. Ensure your thread tension is balanced, testing on scuba fabric scraps and adjusting gradually until stitches appear even on both sides of the seam. Use a walking foot to prevent uneven feeding that creates puckering on scuba fabric seams, particularly when joining multiple layers of this heavyweight material. If puckering persists despite tension and pressure adjustments, examine your needle choice and replace it if necessary, as worn needles frequently cause puckering when used with scuba fabric.
FAQ
What makes scuba fabric different from other knit materials?
Scuba fabric differs from standard jersey and other knits because of its double-knit construction, creating a dense, structured material with excellent recovery and shape retention. The weight and thickness of scuba fabric make it ideal for structured garments and activewear, while its built-in elasticity provides comfort and durability. Scuba fabric's stability means garments maintain their shape after repeated wearing and washing, unlike lighter knits that may stretch out. The material's professional appearance and performance characteristics make it popular for both professional seamstresses and experienced home sewers creating quality garments.
Can beginners sew with scuba fabric successfully?
Beginners can learn to work with scuba fabric successfully by understanding its unique characteristics and using appropriate techniques and equipment. Starting with scuba fabric projects featuring simple seam construction, such as basic tops or athletic wear, allows beginners to develop skills without overwhelming complexity. Practice on scuba fabric scraps before beginning a full project, testing needles, thread, and machine settings to build confidence and understanding. Many beginners find scuba fabric easier than stretchy jerseys because the material's weight provides stability, though the stretch needle and heavyweight techniques do require specific knowledge that beginner sewers must acquire.
How do I prevent seam breakage when sewing scuba fabric?
Seam breakage in scuba fabric garments typically results from rigid thread that won't move with the material's stretch, or from stitches that aren't flexible enough to accommodate movement. Use polyester thread or serger thread instead of standard cotton thread, as these materials maintain elasticity and won't break as scuba fabric moves and stretches. Employ a narrow zigzag stitch when sewing scuba fabric instead of straight stitches, allowing seams to flex with the material without rupturing. Test all seam techniques on scuba fabric scraps under tension before completing full garments, ensuring your stitch selection and thread choice support the movement your finished garment will experience during wear and washing.